Wednesday, June 26, 2013

Hot Pepper Jelly

Ten years ago if someone would have asked me if I canned.....I would have looked at them like they were nuts.  I spent plenty of time watching my mom can when I was young. It is way to complicated and much too time consuming.....or so I thought.  And honestly....it seemed a bit overwhelming.  So many rules....processing times....ugh....kinda scary.  But then a dear friend introduced me to pickling.  He taught me how to pickle asparagus.  I have spent a day or two each spring pickling asparagus since then. 

Last year I had so many hot peppers from my garden that I didn't know what to do with all of them.  I ended up dehydrating them and making pepper flakes.  But I was on a mission to find an easy peasy pepper jelly recipe.  Because let's face it canning still makes me a little nervous and uncomfortable.  I needed a fool-proof method.....a process that anyone could master.

I found this on www.averiecooks.com and after reading her blog I realized that she had some anxiety concerning canning as well.  So....I pulled up my big girl pants and gave it a shot.  I am so glad I did....it turned out great.....very yummy and I can't wait to change up the peppers and adjust the heat just a bit.  Remember we like things pretty spicy.


I have added it to sweet and sour sauce to give it a bit of a kick when served with egg rolls.  But of course my favorite way is on a dab of cream cheese on a cracker.  Makes a great mid day snack.


Hot Pepper Jelly
1 3/4 cup diced red peppers, remove seeds if you want
1 1/2 cup diced green peppers, remove seeds if you want
3/4 cup jalapeno peppers, diced seeds removed
1 cup apple cider vinegar
Two 1.75 boxes of Sure-Jell pectin
(get the pink boxes - less or no sugar)
5 cups white sugar
 

1.  Prepare the glass jars by sterilizing them.  Do this by washing jars and bands in hot soapy water; rinse with warm water. Pour boiling water over flat lids in saucepan off the heat. Let jars stand in hot water until ready to use. Drain well before filling.

2.  Fill a very large stockpot with water and allow it to nearly boil on the stove top.  This may take 30 minutes given the size of the pot and amount of water, and while waiting, complete the rest of the steps.

3.  Put on a pair of rubber kitchen gloves and finely chop the peppers by hand (or pulse using a food processor) and add them to a medium-sized 6 to 8-quart stock pot, taking care to avoid adding the seeds of the pepper to the mixture, being especially cautious with the jalapeno pepper seeds (I sliced each jalapeno in half, down the middle, and removed 80% of the seeds by hand, before finely chopping them).

4.  To the peppers, add the vinegar and Sure-Jell pectin (two packets). Place stockpot on the stove top and bring to a full rolling boil (a boil that doesn’t stop bubbling when stirred) and stir constantly. After a full rolling boil is reached, add the sugar. It will foam and bubble up, and if foam is intense, skim it off with a spoon. Return to a full rolling boil and once full rolling boil is reached (it may take a minute or two to reach it) boil for exactly 1 minute, stirring constantly. Remove pan from heat.


Quickly ladle jelly into the sterile jars, filling to within 1/4 inch of the tops. Cover with flat lids, and screw on bands tightly. Place the jars loosely into the nearly boiling water using tongs or carefully using two spatulas guiding them into the water (or if you have a canning rack, use it and slowly lower jars into pot). The water should cover the jars completely, and should be hot but not boiling when place the jars in. Bring water to a boil, and after it’s boiling, process for 10 to 12 minutes.


After processing, remove jars and place upright on towel to cool completely, and do not disturb them. Choose their resting place wisely, because where ever they are placed, they need to remain undisturbed and untouched until they seal. You may begin to hear loud pops immediately, or within 24 hours and that means the jar has sealed. If you are uncertain if they’ve sealed, after the jars cool, check seals by pressing middle of lid with finger. If the lid is sunken and does not spring back, it’s sealed (success!) If lid springs back, jar is not sealed and refrigeration is necessary. I prefer my pepper jelly chilled and store it in the refrigerator. Unsealed or opened pepper jelly will likely keep for weeks in the refrigerator; and sealed jars of jelly will keep for one year or longer, if stored in a cool, dry place.

 
Happy Wednesday!  Try something new this week....even if you are nervous.  What is the worst thing that could happen?

Tuesday, June 25, 2013

Bow Tie Pasta with Sausage and Spinach

When I think of summer dishes creamy pasta is not at the top of that list.  However, with the gloomy wet weather we have been having the last week or so it is easy to fall back into comfort food mode.    I began to think soup or pasta....really....soup in June....nope....so it had to be pasta. 

Spaghetti and meatballs were out.....not Matt's fave and we just had that dish at Jacob's request a week ago.  No shellfish....Jacob's not a fan....ugh....now what.  So before heading into Safeway....my home away from home.....I looked for a great pasta dish that would please everyone.  I had half the battle won already because I had tossed together a batch of bread dough the night before....and I may have mentioned how much my family loves that bread.  (posted earlier this year.)

So when I came upon this recipe  over at www.foodista.com I thought....this will work.  I did make a few changes...but that is the best part about cooking.....make it your own.

It was a very easy recipe and the family loved it.  In fact they loved it so much....they dug in before I had time to get a pic of the full serving bowl.  I left the kitchen for  minutes and before I knew it they were filling their plates with pasta and bread.  I guess the wonderful smell of garlic was more than they could handle.


Bow Tie Pasta with Sausage and Spinach
12 oz bow tie pasta
1 tbsp. olive oil
1 lb Italian sausage
3 cloves of garlic, minced
4 cups fresh baby spinach
1/2 cup chicken broth
1 cup light sour cream
1/2 cup milk
1 1/2 cups Parmesan/Italian blend cheese
salt and pepper to taste
 
1.  Boil pasta according to package
 
2.  Meanwhile heat oil in a large skillet.  Add garlic and sauté for several minutes.  Stir to make sure the garlic does not burn.
 
3.  Add the sausage to skillet.  Break the meat up and cook completely until no longer pink.
 
4.  Add the spinach and sauté for an additional minute or so....just until wilted.
 
5.  Remove sausage/spinach mixture from pan.
 
6.  In the same skillet that the meat was cooked add the chicken broth....as it is heating scrape any browned pieces from the bottom.
 
7.  Add the sour cream and milk to the heating broth.  Stir until well combined.  Do not boil.
 
8.  Add the cheese stirring until melted and creamy.  Add the spinach/sausage mixture back into the sauce.  Stir to coat.
 
9.  Add drained pasta to skillet tossing gently.
 
10.  Place pasta/sauce mixture into a serving bowl.  Sprinkle with additional cheese if desired.
 
 
Happy Tuesday!  Enjoy!


Saturday, June 22, 2013

Strawberry Coconut Cake

So really we call this cake the "Once A Year Cake".  It is the one thing besides chocolate no bake cookies my husband ever asks for.  Typically, I make this for his birthday...and this year is no exception.  Happy Birthday Sweetie!

This cake is really not difficult to make....it just has a lot of steps.  But don't let that stop you from trying it....it is delicious.  Ray says that it reminds him of the Twinkie like things he had as a kid....you know the ones...they were Twinkies on the inside and then on the outside they were pink/red with coconut sprinkled on.

Nearly 10 years ago Ray was watching the Food Network's Emeril Live and Emeril was making a cake very similar to this.  Of course we didn't bother trying to find the recipe....we just sort of made it up as we went along.  But it was a success....a huge hit!  Everyone that tries this cake loves it...unless you are my nephews.....they make it very clear that they do not like coconut.  Of course....they are very polite about it though.

I know that our version is not as gourmet as perhaps Emeril's was but when it is released from the springform pan and placed on the table it definitely looks "Bakery Yummy".


For the jelly roll I use my Grandma's recipe that came out of an old Betty Crocker cookbook.  If you have a recipe that you love....fell free to use that.
 
 
After you remove the jelly rolls from the oven be sure to sprinkle them well with confectioners sugar and roll tightly until completely cooled.


You will need 2 jelly roll cakes to complete the recipe....just set them aside and let them cool.


Once cooled unroll the cake and spread seedless jam over the entire cake.  Roll the cake up again tightly.

Prepare pudding according to package....the quick set method.  Allow to set for 30 minutes and then mix in thawed cool whip.  Fold in until well combined.

Thinly slice the jelly roll.  Try and make the slices close to the same thickness....just makes it easier to assemble.

Assemble the slices on the bottom and sides of a springform pan.

Spoon the pudding mixture into the pan.  Spread it evenly to cover the top.

Place the remaining slices on the top....gently pressing down.  Cover with plastic wrap and place a plate over top.  Place in the refrigerator to set up.  I will place something on top of the plate to help press down the top layer.


Don't remove from the refrigerator until you are ready to serve.  Slice and eat.
 
 
Strawberry Coconut Cake
 
This is per cake....you will need 2 cakes.  
3 eggs
1 cup sugar
1/3 cup water
1 tsp vanilla
3/4 cup flour
1 tsp baking powder
1/4 tsp salt
about 2/3 cup seedless jam
Powdered sugar
 
1 small box of coconut pudding
2 cups milk
1 cup cool-whip thawed
 
1.  Line jelly roll pan with parchment paper/wax paper.  Spray with non stick spray.
 
2.  Beat eggs for 5 minutes until thick and lemon colored.
 
3.  Gradually beat in sugar.
 
4.  Beat in water and vanilla on low.
 
5.  Gradually add flour, baking powder and salt.  Beating until batter is smooth.
 
6.  Pour onto pan, spreading to the corners.
 
7.  Bake at 375 degrees for 12 - 15 minutes.
 
8.  Remove from oven and immediately  invert cake onto another piece of parchment paper that has a generous amount of powdered sugar on it.  Remove the parchment that the cake was baked on....sprinkle with more sugar and begin to roll tightly.
 
9.  Set aside and allow to cool
 
10.  Repeat steps 1-9
 
11.  Prepare pudding according to package for quick set pudding.  Place in refrigerator and allow to set for 30 minutes.
 
12.  Mix cool-whip into pudding mixture.
 
13.  Unroll jelly rolls and spread jam on each.  Roll again and slice the jelly roll into thin slices.
 
14.  Place the slices into a springform pan along the bottom and the sides.
 
15.  Spoon the pudding mixture into the center and then top with the remaining slices of the cake.
 
16.  Cover and place into the refrigerator to set.  Overnight would be best...but at least 6 hours.
 
17.  Remove when you are ready to serve.


Happy Saturday my Friends!  Enjoy!


Tuesday, June 18, 2013

Shrimp Spring Rolls

I am so excited!  I may have mentioned that we planted a garden this year for the first time in what seems like forever.  We have always had a huge problems with our garden....either it never got enough water or every little woodland critter within 5 miles came for their daily meals.  Don't get me wrong....I love my little critter friends but seeing the rabbits and deer eating all my veggies didn't make me super happy.  But this year I have the fenced in space that used to be the daycare play yard and so far other than the robin eating my strawberries I have been critter free. 

Anyone who knows me...knows that I have 2 black thumbs.  I have a hard time growing anything....I think it is because I get bored and forget to water them.  I know that sounds absolutely awful....but it is the truth. 

I am hoping that this garden will be different.  So far my lettuce has been growing like crazy and I have been providing friends and neighbors with a bounty of leaf lettuce. So today as I was out pulling a few weeds I was admiring all the plants thinking how this summer I will have all the veggies we need for every salad I could imagine. 

With veggies on my mind I began craving spring rolls.  Super easy dinner that everyone loves....even Jakey as long as I leave a few that have no shrimp.  The beautiful thing about spring rolls is that you can totally customize them to suit the taste of everyone.  Jakey doesn't care for shrimp, Matt doesn't like the cilantro but hey....not a problem!
 
 
So with many of my recipes this is the process not so much the ingredients.  There are no rules....as long as you soak the wrappers and wrap well enough to hold in on the yummy goodness all is good.  You got this....no worries.


First thing you need to do is prepare your noodles.  These were Dynasty rice stick noodles....but I have used thin spaghetti noodles in a pinch.  Find your favorite and use them.
 
Then prepare your veggies.  Any combination will work....but I typically use thinly slice carrots, shredded cabbage, green onions, bean sprouts and cilantro.  Feel free to use diced chicken, bbq pork or peeled and deveined shrimp.....or even leave it meat free.
 
These are the wrappers that I use....I am sure that there are other brands....but this is what my local grocery store carries.  Fill a large bowl with warm to hot water....when you are ready to wrap place one of the wrappers into the bowl and soak until it becomes pliable.
 
Lay the pliable wrapper down and lay in the veggies and shrimp.  When you are ready to wrap...fold in the sides and then begin to roll.  Don't worry there are instructions on the spring roll wrapper package.  They may not look perfect....but really who cares....they will taste just as yummy.
 
When I serve mine I typically have a Thai peanut sauce.  I have made my own....but I also love House of Tsang brand.  They have a great Bangkok Padang Peanut Sauce.  It is a bit thick so I will thin it with a bit of chicken broth.  It makes a great dipping sauce for the rolls.
 
 
Shrimp Spring Rolls
 
cabbage
carrots
bean sprouts
cilantro
shrimp
carrots
spring roll wrappers
 
 
Happy Tuesday My Friends!   Enjoy!

Saturday, June 15, 2013

Frozen Strawberry Lemonade

One week til it is officially Summer!  The kids are out of school and the sun is finally out....well kind of.  I think that a summer time cocktail is in order.

A couple of years ago when McDonalds came out with their frozen strawberry lemonades Matt and I quickly fell in love with the yummy sweet and tart treat.  I will be the first to admit that I spent way to much money there the first month they had been introduced.  Due to my guilt of spending too much money  I started brainstorming on how to make an at home version.  When making these you could totally use a blender....but since I was hosting bunco I needed a lot and didn't want to try and blend all through the evening.

  I remember when I was young my mom used to mix up frozen daiquiris but she would combine all the ingredients into a container and just place it in the freezer for a couple of days....and then when she was ready she would pull the container out and scoop some into her glass.

So that had to be the solution.....mix and freeze!  The first time I made them....they had a bit too much vodka but I easily fixed that by adding a bit of Sprite to the top before I added the strawberry puree.  As with many of my recipes....it is more of the process rather that exact amounts.  Feel free to adjust the amounts to your taste.

When I make this I usually use 3 cans of frozen lemonade concentrate....brand doesn't really matter.  I buy what is on sale.  Empty the cans into a very large freezable container that has a lid.  Each can calls for 4 cans of liquid so I will typically use 2 cans of water and 2 cans of vodka.  So lets see if my math is correct 3 cans of concentrate 6 cans of water and 6 cans of vodka.  Again....adjust to your taste.  If you are making it for the kids just use all water and freeze.....works just as well and they love them.

So once you have all the liquids in your container place the lid on it and freeze.....freeze time will vary by how big of a batch you make.  This size takes a couple of days.

For the strawberry puree.....wash and slice the berries.  Place them in a food processor or blender and blend until smooth.  I try and blend til most of the seeds are gone.  Add sugar if your berries are too tart.  Remember that you need a bit of sweetness to go with the tart of the lemonade.  I have also added strawberry syrup to mine.  The type of syrup that they use in Italian Sodas....adds great color and the added sweetness that is needed. 

When you are ready to serve.....remove container from freezer and scoop the lemonade into a glass.  Top with the strawberry puree and garnish with a fresh strawberry.  If the mixture is too frozen add a splash or two of Sprite before you add the strawberry puree....it is delish and makes it easier to drink.

Frozen Strawberry Lemonade
 
3 cans of lemonade concentrate
1/2 gallon of vodka
3 pints of fresh strawberries
sugar to taste
 
sprite, optional


Happy Saturday My Friends!  Cheers to the Summer!

Thursday, June 13, 2013

S'mores Bars

The last day of school has finally arrived!  I know the boys were ready for the year to end....but I have to admit that this year so was I.  In fact, sadly I feel like I checked out weeks ago.  It is really funny how back in the fall....the boys had perfect lunches....perfect breakfast....homework was always checked and daily schedules signed and then spring came.  Maybe I had a really bad case of spring fever but by the time we turned the calendar to May I was asking my teenager if he wanted to buy his lunch just so I could get out of making yet another sandwich.  Does that make me a bad mom?  Nah...I think it makes me a really great mom that just got burned out on the "what kind of sandwich" rotation and I can admit it.

We attended 8th grade graduation yesterday for Matt.  I am so proud of the great person he has become.  He was recognized for his academic achievements over the 3 years and for being and outstanding leader within the school.  Way to go!  I am such a proud mom....of both my boys.  Jakey sailed through 3rd grade but of course I don't have a picture of him since he won't stand still long enough for me to take it.

So of course today I had to have a special lunch for them when they got home from school.  Pizza, fruit, soda and of course S'mores Bars.  My kids love s'mores but lets face it they are a pain in the behind.  I used to make indoor s'mores all the time for my daycare kids.  Microwave the marshmallows....not too long...yikes what a mess.  So when I came across this recipe for them in a bar form I was so excited.  They were super easy and very yummy.  This would be the perfect treat to take to your next neighborhood block party or summer BBQ....make a double batch....they will disappear fast.

A big thanks to sugarcooking.blogspot.com...my kids loved them.


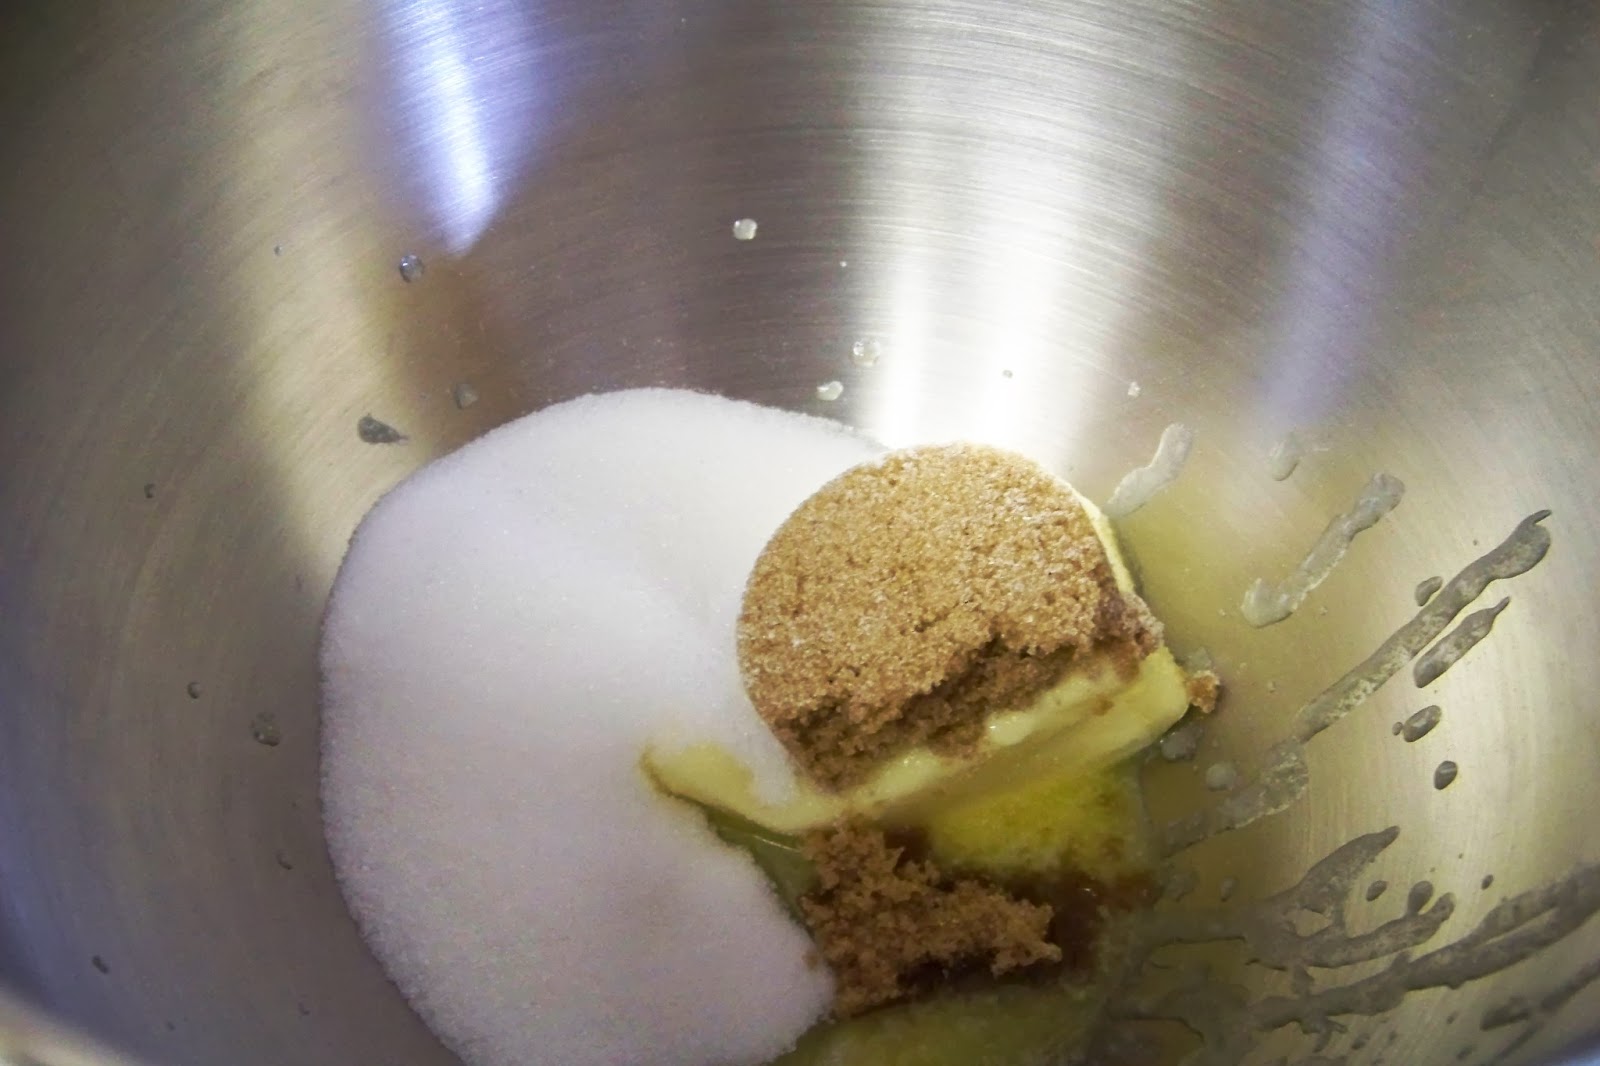
First beat together butter, sugar and brown sugar until creamy. 

Then add an egg and vanilla.  Mix until well combined.


Whisk together graham cracker crumbs, flour, baking powder and salt in a bowl.


Add flour mixture into creamed butter/sugar.  Mixing until well combined and dough forms a ball.

 
Divide dough in half.  Press half of the dough into a 8" square baking dish that has been sprayed with non stick cooking spray.
 
 
Lay the king sized Hershey bars onto the dough.  They will fit nearly perfectly.


Spray a rubber spatula with non stick cooking spray and spread marshmallow fluff over the chocolate bars.  Spraying the spatula isn't essential however it will make spreading the white sticky goodness a whole lot easier.
 
Press the remaining dough onto the top of the fluff.  I pressed my dough on in pieces.....3 to be exact.  It just seemed easier to me to work with a smaller amount but really do what ever works for you.  Remember....no rules....just yummy goodness.
 
Bake at 350 degrees for 30-35 minutes or until the top is golden brown.  Allow to cool a bit before trying to cut them.....the chocolate will be very oozy....yep it's a word...or at least in my kitchen it is.  I also found that about 20 seconds in the microwave with give it just the right gooeyness if it is cooled too much. 


S'mores Bars
 
1/2 cup butter, room temp
1/4 cup brown sugar
1/2 cup sugar
1 large egg
1 tsp vanilla
1 1/3 cup flour
3/4 cup graham cracker crumbs
1 tsp baking powder
1/4 tsp salt
2 king size Hershey Chocolate Bars
1 7 oz container of marshmallow creme
 
1.  Beat together the butter, sugar, and brown sugar until light and fluffy.
 
2.  Add egg and vanilla.  Mix until well combined.
 
3.  Whisk together graham cracker crumbs, flour, baking powder and salt.
 
4.  Add the flour mixture into the butter/sugar.  Continue mixing until dough forms a ball.
 
5.  Divide dough in half.  Press half of the dough into a 8 inch baking dish that has been sprayed with non stick cooking spray.
 
6.  Lay the chocolate bars onto the dough.
 
7.  Spread the marshmallow creme over the chocolate bars.
 
8.  Press the remaining dough onto the top of the marshmallow creme.  Making sure that the top dough is as close to the edge as possible covering the creme.
 
9.  Bake at 350 degrees for 30-35 minutes of until golden brown.
 
10  Remove from oven and allow to cool before cutting.
 
 
Happy Thursday My Friends! 
Remember to take time to let you children know just how proud you are of them.


Tuesday, June 11, 2013

Enchilada Sauce

The other day my husband told me that he had been craving enchiladas and thought that we should add them to our weekly dinner menu.  Sure I thought....super easy and with this being the last week of school we have a pretty busy schedule so easy fits perfectly.  And then he threw out the "but"......"But...do you think you could make a sauce?"  See there are two types of store bought sauces that my family is really not big fans of.  One being enchilada and the other is alfredo. (One day soon I will share my solution to the alfredo  dilemma.)  When we eat at our favorite Mexican restaurant they always order beef enchiladas and eat it all.

So off to my laptop I went in search of enchilada sauce recipes.  I spent a good hour looking and reading over a few....and honestly looking for the ones that listed ingredients that I either had or knew my local grocery store would have.  However, most stores do have great international food aisles these days.  After reading over a few I decided that I would just gather ingredients that I knew my boys would accept and made sauce.  Both boys like spicy.....but not too spicy.....so we tend to make it spicy and then my husband takes his to the next level of spice to please him.

As each boy walked through the door they asked what we were having for dinner.  When I answered them they both made a face and said...."with that gross sauce?"  When I told them that I had made my own sauce they both looked at me and raised a skeptical brow.  So I gave them a tortilla chip and told them to try it.  I decided that when they grabbed another chip and began dipping.....they approved.


This was the sauce that was left after preparing the enchiladas.  I have to admit I hadn't planned on blogging and sharing this because really.....it's just sauce.   But in the words of my teenager...."Mom, this is totally blog worthy!" 

Enchilada Sauce
 
1/2 of a large sweet onion, chopped
3 tbsp oil
1 tsp garlic, minced
2 tbsp chili powder
1 tbsp oregano
1 tbsp cumin
2 tbsp flour
1 15 oz can diced tomato, with green chilies
1 15 oz can diced tomato, fire roasted
2 1/2 cups chicken broth 
 
1.  Add oil to dutch oven or heavy bottom pan.  Heat to medium and then add chopped onion.  Saute for 5-7 minutes until onions are tender.
 
2.  Add garlic, chili powder, oregano and cumin....stirring constantly to make sure that the garlic doesn't burn.  Cook for 2 minutes.
 
3.  Add the flour, stirring to make sure that the flour is well combined.  Cook another 2 minutes.
 
4.  Add tomatoes and chicken broth.  Bring to boil.  Simmer, stirring to combine all ingredients.  Sauce will begin to thicken.  Will take about 15 minutes.
 
5.  Allow sauce to cool a bit and then use a food processor or blender to blend the sauce to make it  smooth. 
 
 
I filled my tortillas with ground beef that had about 1/2 cup of the sauce mixed with it.  Lay the rolled tortillas into a pan and ladle the sauce over top.
 
 
I have a feeling that I will be making a lot of this sauce in the future.  I gave the remaining sauce to my dad to have.  My mom doesn't care for enchilada sauce at all She will buy a can and pour it on a burrito for my dad occasionally.  So when I told her I was making this sauce....she reminded me that she didn't care for that type of sauce.  Hmmm....I think I may have changed her mind.  She called shortly after I had given her the jar and she told me that it was really good....and she may need to get that recipe.  One less enchilada sauce hater....my job here is done!
 
 
Happy Tuesday My Friends!


Thursday, June 6, 2013

Thai Curry Chicken Meatballs

When it comes to trying new foods/recipes my family is really pretty good about it. Sometimes it does take a bit of convincing for them to take that first bite....especially Jacob. I am a firm believer in the "2 bite" rule. He is not allowed to tell me he doesn't like something unless he has given it a fair chance with 2 bites.  Maybe it goes back to all the years I did daycare....but I always had kids trying new foods...and most of the time they really like it.  If all else fails give it a fun name and they will always try it.

Way back when my husband and I were first married I tried making a curry dish....ugh!  We lived in a very small apartment and it smelled for weeks.  Curry meatballs with a curried rice....lets just say we ate out that night.  After that I have always been a bit hesitant to cook with curry.  We love eating curry.....anywhere but at home.  So when I came across this recipe I put on my big girl pants and decided I would once again give curry a try....after all it has been nearly 22 years.

Let me be the first to say that it was delish!  The house smelled incredible....in a good way.  It is definitely a dish I would make again.


Combine ground chicken, curry paste, panko bread crumbs, cilantro, fish sauce, soy sauce and salt together.  Form meat mixture into balls and brown in a large skillet.


When meatballs are browned remove from pan and set aside.

Next, sauté 1/4 of an onion in the same pan with curry paste and garlic.  Add coconut milk, chicken broth, fish sauce, soy sauce, sugar, red chili slices and simmer for 10 min.  Add meatballs back into sauce add thin fresh green beans and baby corn.  Continue simmering until veggies are tender.  ( I wish I had a picture for you but I was breaking up an argument between my darling children and forgot....sorry.)


Serve over steamed Jasmine rice.  Be sure to ladle a bit of the sauce over the top...it was super yummy and soaked up in the rice.
 
 
Thai Curry Chicken Meatballs
 
18 oz of ground chicken
1 tsp red curry paste
2 oz panko bread crumbs
3 tbsp. fresh chopped cilantro
1 tbsp. fish sauce
1 tbsp. soy sauce
 
 
1/4 sweet onion chopped
2 tsp red curry paste
2 garlic cloves crushed
1 can coconut milk
1 can chicken broth
2 tbsp. fish sauce
2 tbsp. soy sauce
2 tsp sugar
1 red chili pepper, thinly sliced
green beans, small thin
1 can baby corn
 
 
1.  For the meatballs combine chicken, curry paste, bread crumbs, cilantro, fish sauce and soy sauce until well combined and form meat into balls.
 
2.  In a large skillet add just enough oil to coat the bottom.  Add meatballs and brown on all sides until cooked through.
 
3.  Remove meatballs from skillet and set aside.
 
4.  In the same pan add the chopped onion and curry paste.  Saute until the curry paste begins to stick to the bottom of the pan.  Add the crushed garlic and cook another minute. 
 
5.  Add the coconut milk and chicken broth.  Stir well to combine.  Add fish sauce, soy sauce, sugar and sliced chili.  Allow to simmer for 10 minutes.
 
6.  Add the meatballs back in the sauce mixture and simmer another 10 minutes.
 
7.  Add in the green beans and corn.  Bring back to a simmer...cook another 5-7 minutes or until veggies are tender.
 
8.  Serve over steamed jasmine rice.
 
 
Happy Thursday! 
Remember....try something new...you may enjoy it!


Wednesday, June 5, 2013

Toasted Coconut Pound Cake

I may have mentioned before that I can not resist chocolate and peanut butter....but I may have neglected to mention that I also love toasted coconut!  I think the smell of it toasting is just as yummy as the flavor....it is one of those scents that fill your home with "cozy" and bring back memories that make you smile.  So when I came across this lil treat I knew I was going to have to give it a try.  Thanks to the folks over at littlebitsof.com for sharing.

It was very easy to mix up...the one thing that I noticed though was that it is more like a bread texture.  It seemed to be a bit dense...sometimes my banana bread will turn out that way.  I am sure it is just me and has nothing to do with the recipe.  If you are a coconut fan....this is a definite must try.


As some of you know....sometimes I don't measure...I just eyeball it.  And as you can see....I should have measure the buttermilk for the glaze.  I may have gotten a bit more than the 2tbsp that the recipe calls for.  I know...just measure!  I drive my husband crazy with this too.


Beat the butter and sugar until light and fluffy.  Add the vanilla and eggs...one at a time.  Be sure to scrape down the sides if you need to.  Add flour and buttermilk...alternating between the two.  (a third of the flour, 1/2 of the milk and so on until all is added)  Beat until well combined.


Fold in 1 1/4 cups toasted coconut.


Butter and flour a loaf pan.  Pour cake batter into pan and bake at 350 degrees for 1 hour or until toothpick comes out clean.

When done baking remove from oven and place on rack to cool completely.


Drizzle glaze over the cake and sprinkle with the remaining coconut.  Slice and serve.


Toasted Coconut Pound Cake


1 1/2 sticks unsalted butter, room temp
2 cups flour
1 1/2 tsp baking powder
1/2 tsp salt
1 cup sugar
1tsp vanilla
3 eggs
1 cup buttermilk
1 1/2 cups sweetened shredded coconut, toasted
 
1 cup confectioner's sugar
2 tbsp. buttermilk
 
 
1.  Whisk together flour, baking powder and salt.
 
2.  Blend together butter and sugar until light and fluffy.  Add vanilla and eggs, one at a time. 
 
3.  Add flour and buttermilk to the butter mixture.  Add a 1/3 of the flour followed by 1/2 of the milk.  Repeat until all the ingredients have been added.  Beat until well combined.
 
4.  Butter and flour a loaf pan.  Add the cake batter to prepared loaf pan.
 
5.  Bake at 350 degrees for 1 hour or until a toothpick comes out clean.
 
6.  Remove from oven and allow to cool completely.
 
7.  Once it is cool combine 1 cup of confectioner's sugar and 2 tbsp of buttermilk.  Whisk until well combined and then drizzle over cooled cake.
 
8.  Sprinkle the remaining coconut on top of the drizzled cake.
 
9.  Slice and serve.
 
 
I wish I had a picture of the cake sliced.  But truth be told it was on a Saturday evening and once it was sliced it was gone.  Matt was a huge fan...as was Papa and Grandma.  In fact Papa said that the only thing that would have made it better would have been a cup of coffee and another slice.  That's my dad!
 
 
Happy Wednesday my Friends!  Enjoy!