Wednesday, August 28, 2013

Apple Snickerdoodle Cobbler

I think I may have already mentioned how much I love Fall!  My boys have 1 week until school starts....the weather is already changing.  The leaves are starting to change....a few damp drizzly mornings....yep Fall is on its way. 

A week ago my friend Heidi gave me a bag of apples that she had gathered off one of her trees.  She has 3 so you can imagine the bounty of apples she has to share.  Anyway, I wanted to find something a little different.  Don't get me wrong who doesn't love a great apple pie, crisp or cobbler....but I was looking for a recipe a little "out of the norm".  When I came across this over at www.bakedbyrachel.com I knew it was what I was looking for.  Simple and quick but different....just what I wanted.

I will admit that I used the easy button today....I didn't make my own cookie dough.  I was shopping at Fred Meyer this morning and found pre-made snickerdoodle cookie dough.  I know right!  I was just going to use sugar cookie dough....but I hit the jackpot.   

So I grabbed my apple peeler gadget and the apples and got to it.  Seriously this couldn't be easier....peeling the apples takes the longest and even that was a piece of cake with the peeler.  It made the house smell incredible!  Apples and cinnamon....really....for me it doesn't get much better.

The cookie topping makes a nice little spot for whip cream to sit.....just the right amount of sweet....the apples are still a bit tart.  Just perfect.

Peel and slice 7 cups of apples.  Add brown sugar and cinnamon.  Toss to mix.


Place the sugar coated apples into a 8x8 baking dish.

Grab your cookie dough....store bought or some that you have made.....have a cinnamon and sugar mixture to roll the cookie balls in. 

Place the cookie pieces on top of the sliced apples.  Bake at 350 degrees for 45-55 minutes.


Remove from oven and allow to cool slightly before serving.

Scoop some into a bowl...be sure to grab a cookie topper......

 The a dollop of whip cream or a scoop of your favorite vanilla ice cream....either way you will love it.

Apple Snickerdoodle Cobbler
 
7 cups sliced apples, peeled
1/4 cup brown sugar
1/2 tsp cinnamon
1 pkg of sugar cookie dough, or snickerdoodle dough
 
 
1.  Peel and slice apples.
 
2.  Toss apples with brown sugar and cinnamon.
 
3.  Place apples into a 8x8 baking dish.
 
4.  Roll cookie dough in a mixture of cinnamon and sugar.  Flatten balls and place on apples slices.
 
5.  Bake at 350 degrees for 45-55 min.  Remove from oven and cool before serving.
 
 
Happy Wednesday!  Enjoy!
 

Tuesday, August 27, 2013

Razor Clam Fritters

It is possible that I have never mentioned that I love seafood.  I guess growing up in the Pacific Northwest only an hour from the Pacific Ocean could have something to do with it....but what ever the reason....I am a huge fan.  Actually, my husband and older son have the same passion that I do.  However, my younger son does not feel the same.  I will say though, that he will eat halibut.  And by eat I mean take a bite....and say...."that's not too bad". 

My husband loves to go digging for razor clams....me...not so much.  We have an agreement though....he digs....and I clean.  Some may say that I have the yucky job....but at least I am warm and dry.

Anyway...I am sure that many of you can just buy razor clams at your favorite seafood market and not have to dig for them.  But regardless of how you get them...if you enjoy shellfish you have to give these a try.  And for those of you who aren't sure.....try them....they are delish.

The key to these little treats are getting the clams chopped (in your food processor) to small pieces.  And then frying them to get the golden crust on the outside.


Razor Clam Fritter
 
1 to 1 1/2 pounds razor clams, cleaned
1 egg, beaten
1/2 cup -3/4 cup crushed butter crackers
salt and pepper
2 tbsp. butter
 
1.  Place the cleaned clams into a food processor and chop into a small chunk consistency.
 
2.  Place clam meat into a large bowl.
 
3.  Add the egg and crackers.  Using your hands mix well.  The mixture should hold together but still be moist.  Start with 1/2 cup of crackers and add more if needed.
 
4.  Add salt and pepper.
 
5.  Form patties out of mixture. 
 
6.  Heat a large pan on medium heat.  Drizzle olive oil across the bottom of the pan and add 2 tbsp. of butter.
 
7.  When the skillet is hot and the butter has melted add the clam patties.  Fry the patties flipping them over once they become golden brown. It should be about 4 min on each side.


  Happy Tuesday my Friends!

Thursday, August 22, 2013

Peanut Butter Cornflake Cookies

With school starting in less than 2 weeks, I decided that I should get a start on finding good after school snacks.  I may have mentioned before that my family loves peanut butter.  It is a pretty safe bet that my boys will love any cookie I make if it has pb in it.

While drinking my cup of coffee the other morning I came across these little sweeties over at www.sixsistersstuff.com.  When I read how addicting these are I thought.....I have to make them!  Not exactly sure what I was thinking.....lord knows the last thing I need in the house are addicting peanut butter cookies.  But I made them....and oh my they are delish.  The peanut butter mixture  is creamy and kind of reminds me of a fudge consistency.  (yes...I did lick the spoon clean after they were mixed up)

Matt couldn't wait for the chocolate to be drizzled on before he had to try them.  He loved them without the chocolate and both boys "super loved" them with the drizzle. 

They are very sweet...I think when I make them again I will make the cookies a bit smaller.  I was in a hurry and they did turn out a bit on the large side.


Bring corn syrup and sugar to a boil over medium heat.


Remove pan from heat and add peanut butter.  Stir well until mixture is creamy and smooth.

Pour peanut butter mixture over cornflakes.  Gently toss to coat well.

Make mounds of cookies on wax paper.

Drizzle each cookie with melted chocolate.


Peanut Butter Cornflake Cookies
 
1 cup sugar
1 cup light corn syrup
18 oz creamy peanut butter
6 cups cornflakes
1/2 cup semi sweet chocolate chips
 
1.  Bring sugar and corn syrup to a boil in medium saucepan.
 
2.  Remove from heat and add peanut butter.  Stir until peanut butter is melted and  well combined.
 
3.  Place cornflakes into a large bowl.  Pour peanut butter mixture over the cornflakes and toss to coat well.
 
4.  Using your hands or a spoon form cookies and place on wax paper to set.
 
5.  Place chocolate chips into a bowl and microwave for 30-45 seconds until melted and smooth.
 
6.  Drizzle chocolate over cookies.  *
 
*I have found that the chocolate is much easier to drizzle if the melted chocolate is placed in a small zip-lock baggie and the corner cut off.  With a light squeeze the chocolate is much easier to drizzle.


Happy Thursday My Friends!  Enjoy!


Wednesday, August 21, 2013

Garlic Focaccia Bread

You know there are a lot of things that I can do....in fact there are very few things that intimidate me....at least when it comes to cooking and baking.  I am always willing to try a new technique or a new ingredient.  Then there is baking bread.....yeast.....ugh!  Last fall I found a recipe for bread that I managed to master.  Whip up the dough....let it set on the counter over night....and bake the next day.  It is a no fail recipe....right up my alley.  I think really what it boils down to is.....I am very impatient and I have this really bad habit of not being exact in my measurements.  So when it comes to yeast....we don't always agree on temps and times.

I have a friend that is ALWAYS making breads....a mom that makes delicious rolls and they both leave me behind having bread envy.  Until now!  I pinned this focaccia recipe months ago from www.aspicyperspective.com.  My friend Heidi made it....her family loved it.  I have looked at it day after day trying to gain the courage and confidence to give it a try. 

Yesterday, we had pasta on the menu for dinner and I had no bread to serve with it.  I had been cleaning all day....I smelled like bleach...messy hair and feeling blah....I really didn't want to go to Safeway.  So...I pulled up the focaccia recipe and decided to give it a try.

I am so glad that I did.  It was so delicious....very easy and it turned out beautiful.  The dough raised up like it was supposed to....I am feeling very proud.  The funny thing is....I had no intention of blogging this recipe so I didn't take pics along the way....Until....the dough had risen and looked so gorgeous.


The original recipe called for roasted garlic and olives....I left out the olives and used minced garlic instead.  You could change it up and add sun dried tomatoes...I think dividing the dough and baking it thinner and using it as a pizza crust.  But the bottom line....it is delicious!


Garlic Focaccia Bread
 
¼ cups Hot Water
2 teaspoons Honey
1 package Dry Active Yeast (2 Tsp Packet Size)
1-½ cup Cold Water
3 Tablespoons Olive Oil + Extra For Bowl And Dish
1-½ teaspoon Sea Salt
2 Tablespoons minced garlic
4 cups All-purpose Flour
Salt And Pepper
 
1.  Pour the hot water and honey into the bowl of your electric mixer. Swirl the bowl around until the honey has dissolved and the water is just luke-warm.

2.  Add one package of dry active yeast and swirl around. Allow the yeast to foam for 10 minutes or so.

3.  Then add the cold water, 3 tablespoons oil, salt, and  garlic.

4.  Using the bread hook attachment, turn the mixer on low and slowly add the flour. “Knead” on low for about 10 minutes.

5.  Pull the dough away from the sides and rub the bowl down with oil. Cover the bowl with plastic wrap and allow the dough to rise for 1 ½ to 2 hours.

6.   Remove the plastic wrap and turn the mixer back on for 30 seconds.

7.  Thoroughly oil a 9×13 or 11×15 rimmed baking dish. Press to dough to the edges, don’t be afraid to let your fingers puncture the dough—this will created the bumpy, rustic texture of traditional focaccia bread.

8.  Drizzle the top with more olive oil and sprinkle with sea salt and pepper. Cover the dough with a clean damp towel. Allow the dough to rise again for at least 1 hour.

9.  Preheat the oven to 400ºF. Bake for 35-45 minutes, until the top is golden-brown. (If you used a 11×15 dish, it might be more like 30-35 minutes.)

You can leave the focaccia in the baking dish or turn it out for easy cutting.
 
Today....take on a challenge and conquer it!
Happy Tuesday! 


Friday, August 16, 2013

Dutch Baby Pancake

One of Matt's favorite things to have for breakfast is a dutch baby.  He loves a sweet treat for breakfast.....it could be because he is a teenage boy and sleeps until 10....but for whatever reason he loves them.   

These little babies are super easy and really very versatile.  For those of you who have never had one....they are very light on the inside...a bit of a crisp crunch on the outer edge.  Fresh berries and a little whip cream and you have a great dessert.  A little syrup and its breakfast.

Of course my child loves it with a few chocolate chips sprinkled on it when it comes out of the oven so they begin to melt.  His favorite is when we have fresh strawberries to slice and lay on it.  But this morning we were out of berries....so we had to improvise and use raspberry jam and a sprinkle of powdered sugar.  Why? Well because in my house everything is better with a dusting of sugar. 


When you get ready to make these....it takes less than 5 minutes to whip together the batter.  Waiting for the oven to preheat takes longer than to prepare it.

Lay butter in a 9" baking dish or pan and place into a 425 degree oven while it is preheating.

Whip together eggs, milk and flour.

When oven is preheated remove pan carefully....it will be hot.

Pour batter into hot pan and place back into the oven and bake for 20-25 minutes.

Remove from oven after the magic has happened.  I will puff up around the edges making a bowl shaped pancake.

Regardless of how you decide to top it....it will be yummy!  I promise.


Dutch Baby Pancake
 
2 tbsp. butter
4 eggs
1/2 cup flour
1/2 cup milk
 
1.  Place 2 tbsp. of butter into a baking dish and place in a 425 degree oven as it is preheating.  The butter will melt.
 
2.  Whisk together eggs, milk and flour.
 
3.  When oven is preheated pour batter into hot pan on top of melted butter.
 
4.  Place back into the oven and bake for 20-25 minutes.
 
5.  Remove from oven.  Top with your favorite toppings.
 
 
Happy Friday My Friends!  Enjoy!

Tuesday, August 13, 2013

Chocolate Zucchini Cake


Ahhh....mid August...still of few weeks of summer to go.  Now I know that I will not be making many friends with what I am about to say....but....I am ready for Fall.  I love Fall....I don't know why but really it has to be my favorite season.  I love the colors of Fall....the cool crisp sunny days....and all the wonderful Fall recipes that I have to prepare for my family and friends.
 
Of course....it is my friends fault that I got thinking about Fall.  A quick trip to her garden the other day and she sent me home with a bag of apples, a zucchini and a bunch of garlic.  All those things just scream FALL! to me.  So...thanks Heidi!  You are the best.
 
My family loves zucchini bread....well...to be honest not Jakey.  Of course I think he hears zucchini and thinks veg...not delish sweet bread.  Oh...that boy!  So I thought maybe I would try chocolate....I know if I could just get him to try it he would love it. 
 
 
I came across this recipe over at www.caramelpotatoes.com and it looked and sounded perfect so I thought I would give it a try.  I can tell you as it was baking it filled the house with this wonderful smell of chocolate with the slight hint of cinnamon.  In fact the funny thing was Jake said "wow...that smells really good".  

After I took the cake out and let it cool just a bit I sprinkled powdered sugar on top hoping  to disguise the green flecks to my lil skeptic.  The cake was super moist....had a rich chocolate flavor and the boys LOVED it....even Jake.  (and my nephew Kyle.....he is worse than Jake when it comes to trying new things.)

So...the battle was won.  I will silently put a check in the win column for this Momma.


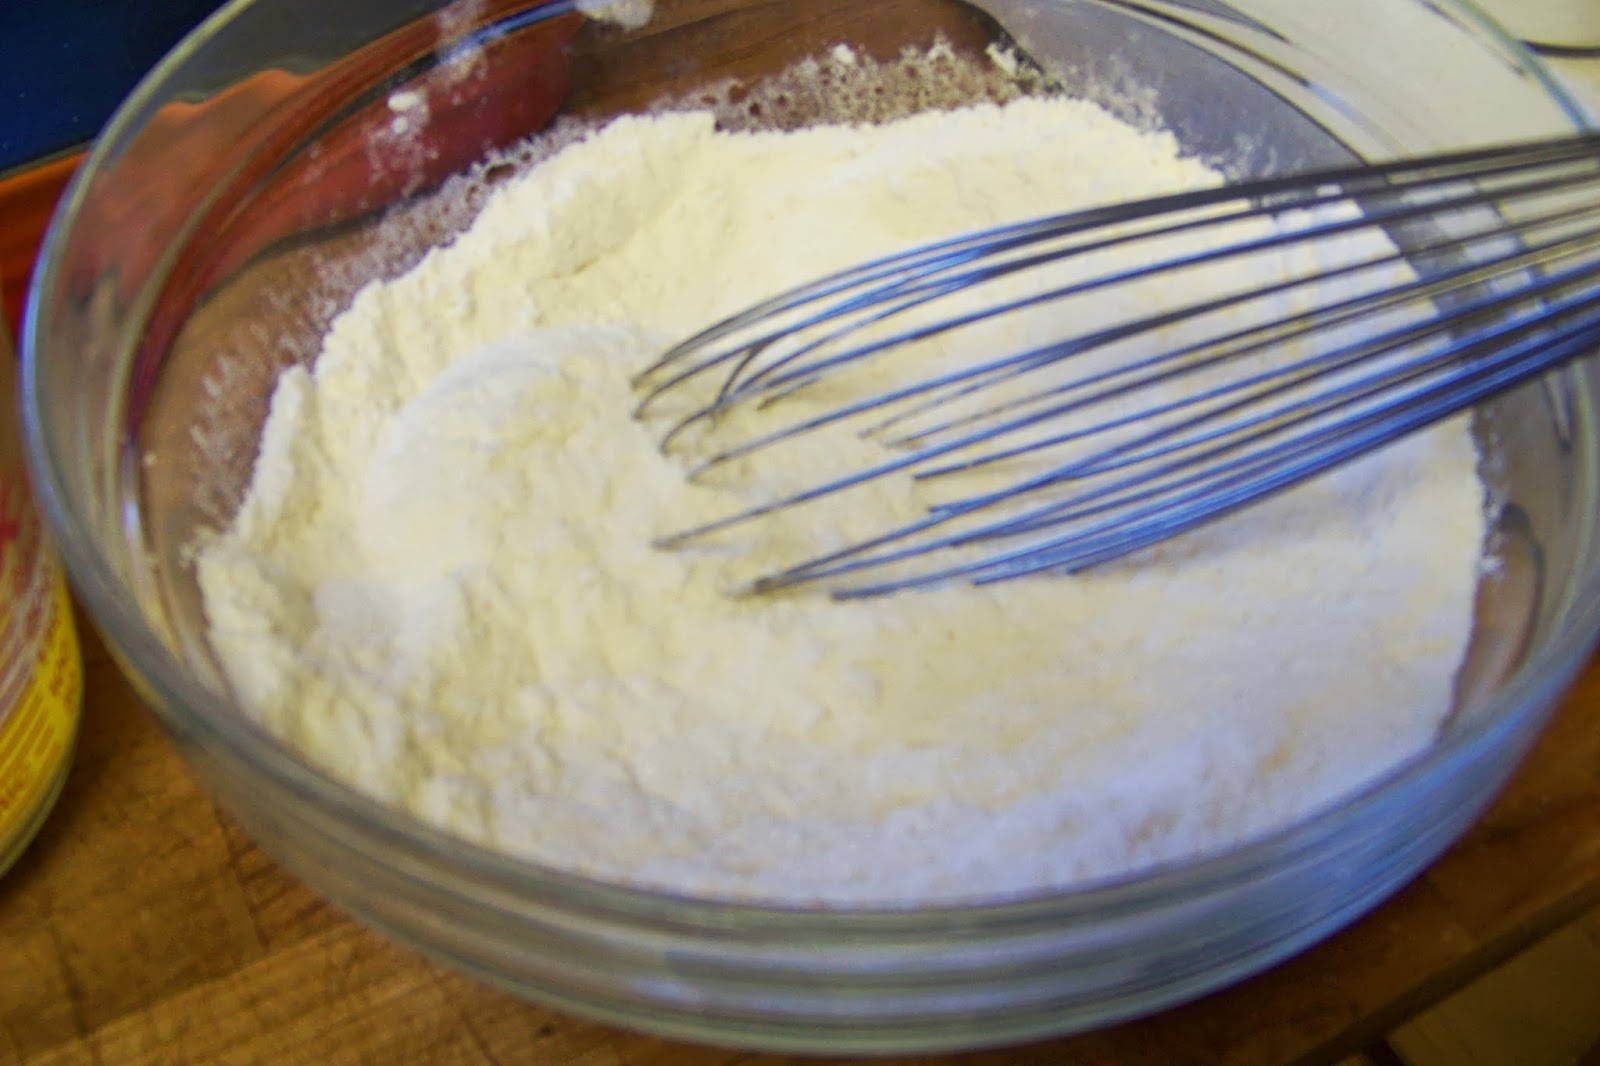
Measure flour, cocoa, baking powder, salt, cinnamon and ground cloves into a bowl.

Use a whisk and combine the dry ingredients well.

Grate or chop zucchini until you have 2 cups. 

Beat sugar, softened butter and oil until smooth.

Add eggs, buttermilk and vanilla.  Blend until combined.

Slowly add the dry mixture.  Beat on low until well combined.  I added it a cup at a time just to be sure that it was well incorporated into the wet ingredients.  Then fold in the chopped zucchini.

Last came the chocolate chips.  The original recipe calls for the chips to be sprinkled on top of the cake batter after it has been poured into the pan.  I kind of forgot and just folded the chips in before the pan....oops!  But here is the good news.....it still came out just fine!  There are little hidden pockets of melty chips within the cake instead of having it on the upper layer.  You decide how you want to add them...either way is great.


Pour the cake batter into a 13x9 baking pan that has been sprayed with cooking spray.  Place into a 325 degree oven for 40-45 minutes.

 Remove from oven and allow to cool a bit before cutting to serve.

A little dusting of powdered sugar and they are ready!

 
 Chocolate Zucchini Cake
 
   2 1/2 cups flour
1/4 cup Dutch-processed cocoa powder
1 teaspoon baking soda
1/2 teaspoon baking powder
1/2 teaspoon salt
1/2 teaspoon ground cinnamon
1/4 teaspoon ground cloves
8 tablespoons (1 stick) unsalted butter, softened
1/2 cup vegetable oil
1 3/4 cup sugar
2 large eggs
1 teaspoon vanilla extract
1/2 cup buttermilk
2 medium zucchini, seeded and shredded (about 2 cups)
3/4 cup semisweet chocolate chips
 
1.  Adjust oven rack to middle position and heat oven to 325 degrees.
 
2.  Grease 13- by 9-inch baking pan.
 
3.  Combine flour, cocoa, baking soda, baking powder, salt, cinnamon, and cloves in bowl.
 
4.  With electric mixer on medium speed, beat butter, oil, and sugar until smooth.
 
5.  Add eggs, vanilla, and buttermilk and mix until incorporated.
 
6.  Stir in flour mixture until combined.
 
7.  Stir in zucchini, then pour mixture into prepared pan.
 
8.  Top batter with chocolate chips and bake until toothpick inserted in center comes out clean, about 40-45 minutes. Cool on wire rack. Serve.
 
 
Happy Tuesday My Friends!  Enjoy!

Saturday, August 10, 2013

Buffalo Chicken Sliders

Yes....Football Season is almost upon us.  My adored Seahawks had their first pre-season game Thursday evening....and now I have the Tail-gating bug!  Ok...we really don't tailgate....our friends all gather to watch the game and enjoy tailgating type food.  Of course the menu does vary depending on what time the game is.  Our early morning games will have a breakfast theme....but I prefer the later games....the menu has a much wider range.

Most folks love buffalo chicken in some form.  But I wanted to gather the flavor....make it easy to eat....without the messy fingers.  I know for some the messier the better....but not for me.....I prefer not messy. 

I found a recipe over on www.shrinkingkitchen.com for buffalo chicken meatballs that I had originally pinned to use as an appetizer for Bunco night.  But when I saw it again I realized....hey...I could just flatten the balls and turn that into a great little slider...but I really wanted to keep the "healthy" appeal that it had.

I really didn't stray to far from the original recipe.....I did use the stove top to cook them instead of the oven. (mostly because it was nearly 90 that day)  I added more franks hot sauce and I probably added more blue cheese than it called for.....but I am a huge cheese lover....you decide how much cheese to use.


When I was ready to serve them....I had a bit of ranch dressing on each slider roll and had iceberg lettuce.  Yes....there was a bit of blue cheese on the side just in case SOMEONE (ok me) wanted a bit extra on the roll.  But here is the thing....I had to get expensive cheese at Costco because I forgot to pick it up at Walmart.  You know...I am used to buying the pre-crumbled kind that comes in the plastic container.  Let me tell you....this type from Costco was delish....totally creamy...not super strong....just plain yummy!


Buffalo Chicken Sliders
 
1 pound lean ground chicken
1 egg
1/2 cup panko bread crumbs
1 celery stalk
1 carrot
2 green onions
1/2 tsp garlic powder
1/4 tsp salt
1 oz of crumbled blue cheese *
1/2 cup Frank's hot sauce, divided *
1 tbsp. butter, melted
 
1.  Cut celery, carrot (peeled) and green onion into large pieces and place in a food processor.  Pulse until veggies are a fine consistency.
 
2.  In large bowl combine veggies, chicken, egg, bread crumbs, garlic powder, salt, blue cheese and 1/4 cup hot sauce.
 
3.  With hands mix until well combined....do not over mix.
 
4.  Form small slider patties.....you should be able to have 12 equal in size.
 
5.  Spray large skillet with cooking spray.  Place patties into pan.....fry until done. 
 
6.  While the slider patties are cooking melt butter.  Add the remaining 1/4 cup of hot sauce to the melted butter.  Whisk until well combined.
 
7.   When chicken is done....brush the butter mixture over the top of the patties.
 
8.  Serve on slider rolls with iceberg lettuce, ranch dressing and blue cheese crumbles if desired.
 
*  I probably used a 1/2 cup of Frank's in the meat mixture and 2 -3 ounces of cheese.


Happy Saturday My Friends! 
Enjoy a pre-season game this weekend with friends.....don't forget the sliders.


Thursday, August 8, 2013

Broccoli Salad

Those hot summer days always brings salads to mind in our house.  I will often mix up some type of salad on Monday and my family will eat it with meals all week long.  Last week it was an Italian pasta salad.....this week it is broccoli salad.  I started making this salad 10 years ago....I remember because the first time I made it I was pregnant with my youngest son and I had to make a huge bowl for my Dad's 60th birthday party.  I had horrible morning sickness....which was more like "all day" sickness.  Wow...that seems like a long time ago.....my dad will be 70 at the end of this month....and since then I have made this salad dozens of times. 

Here is the good news.....it is simple easy!  Really...the most difficult part is trimming the broccoli and frying bacon.  I know there are lots of variations out there for this salad.  Some call for cranberries and sunflower seeds.....some for red onion....all seem good....but this is my favorite.


Chop and trim 5 cups of broccoli.  I tend to trim mine into small pieces.  It takes a little more time but I find that it is easier to eat.  Bottom line....the size will no change the flavor....so do what is best for you.

Finely chop green onions.

Fry 5-6 strips of bacon until crisp.....and crumble when cool.  I usually cut my bacon into pieces before I put it in the pan.  Save me a step and you don't have to worry about the bacon having enough room to lay flat.

Gather up the cashews and golden raisins.

Toss everything together into a large bowl.

For the dressing combine mayo, brown sugar and rice wine vinegar.  Apple cider vinegar would work just as well.....but I prefer rice wine.  Whisk together until creamy and well combined.  I typically will add a tablespoon or so of milk....just to thin it a bit....it will make it easier to toss in the salad.

Pour over the salad and toss until all the yummy pieces of broccoli are coated.

There it is....perfect for eating right now....or place in the refrigerator and enjoy later. 

For those of you who have never had this salad or some variation.....you are probably thinking "ugh...what a combination!"  But don't be too quick to judge....it really is delish.


Broccoli Salad
 
5 cups of trimmed broccoli
5-6 pieces of  bacon, crisp and crumbled
1 cup of golden raisins
1 cup cashews
 
1 1/2 cup mayo
1/2 cup brown sugar
1/4 rice wine vinegar
1 tbsp. milk
 
1.  Wash and trim broccoli.  Place into a large bowl.
 
2.  Toss broccoli with bacon, raisins and cashews.
 
3.  For the dressing....mix mayo, brown sugar and vinegar.  Whisk until well combined.  Add the milk to thin the dressing.....whisk until milk is incorporated into the dressing.
 
4.  Pour dressing over salad and toss.
 
 
Happy Thursday my Friends!  Enjoy!

Tuesday, August 6, 2013

Blackberry Cobbler

One of my favorite things about summer is fresh berries.  I remember as a little girl picking blackberries and huckleberries right behind our house.  My grandma would make blackberry pies...my mom would make jam....it was a summer time treat.  Now as a mom I get to share that summer treat with my boys. 

Over the weekend we were enjoying a summer bbq with friends and we were served the most delicious blackberry cobbler.  After we all raved about it my dear friend tells us it is a Pioneer Woman recipe and it was super easy.  Well...you know me....the minute I got home I got on the laptop and went straight to her blog.  (which of course I have on my favorites!)  www.thepioneerwoman.com  for those of you who are not yet fans....take a peek...you will not be disappointed.

So off to the berry bushes my husband went....picking 2 cups of beautiful juicy blackberries.  It helps that we live on 7 acres and finding berries isn't  too difficult.  My friend was right....the recipe was super easy and I had this yummy dessert in the oven in 10 minutes.


My husband thought that vanilla ice cream would have made it perfect.....but we only had whip cream.....which seemed to be just as yummy because they ate it all.


Whisk together the flour and sugar in a bowl. 

Whisk in the milk until well combined.  And then add the melted butter.  Combine well.

Pour batter into a buttered baking dish.  Pour batter into baking dish.  Sprinkle the berries over the batter.  Sprinkle remaining sugar over the top of the berries.  Bake at 350 degrees for 1 hour.

Remove from oven and allow to cool.  It is super delish if served with whip cream or ice cream when the cobbler is still a little warm.

Blackberry Cobbler
 
1 stick of butter, melted
1 1/4 cup sugar
1 cup flour
1 cup of milk
2 cups of blackberries
 
1.  Whisk together 1 cup sugar and 1 cup flour.
 
2.  Whisk in 1 cup of milk.
 
3.  Melt butter and add to milk/flour mixture.  Whisking until well combined.
 
4.  Pour batter into a well buttered baking dish.  I used an 8x8...but could have used slightly larger.
 
5.  Wash and pat the berries dry.  Sprinkle them over the cake batter evenly.
 
6.  Sprinkle the remaining 1/4 cup of sugar over the top.
 
7.  Place in a 350 degree oven for 1 hour.  Bake until golden brown. 
 
8.  Remove from oven and allow to cool slightly before cutting.
 
* I baked this in an 8x8 baking dish and my baking time was nearly and hour and 15 minutes.  You will know when it is finished....just insert a toothpick into the center and when it comes out clean the cake is done.
 
Happy Tuesday!  Remember....your childhood memories are always worth sharing with your children.